Find The Easiest Way to Weld Aluminum: Options And Helpful Tips
Aluminum is a common metal, but it’s not considered easy to weld. To get the best results as a beginner, it’s helpful to know what is the easiest way to weld aluminum.
The easiest way to weld aluminum is with a spool gun attached to a MIG welder. The next easiest option is a MIG welder, after modifying the wire-feed mechanism for aluminum wire. TIG and stick welding are difficult processes for aluminum, each one for its reasons.
In the rest of the article, you can read about the difficulties, how the common arc welding processes perform, and tips to make things easier. Finally, we’ll see a very easy alternative method to bond aluminum.
Table of Contents
- The difficulties of aluminum welding
- What is the easiest aluminum to weld?
- What is the easiest aluminum filler metal to use?
- A spool gun is the easiest way to weld aluminum
- MIG is easy but has wire-feeding issues
- With TIG it’s hard to weld aluminum but gives the best results
- Stick welding is hard and messy, but it’s suitable for repairs
- Tips for easier aluminum welding
- An alternative easier way to bond aluminum
- Conclusion
The difficulties of aluminum welding
The worse problem with aluminum welding is that it’s sensitive to hot cracking. Hot cracking happens when the weld metal starts to solidify.
Molten aluminum is very weak, the strong shrinkage forces can crack the bead in the center from start to end. Choosing the proper filler metal is the main factor to avoid it.
Aluminum has high thermal conductivity. It pulls the heat from the joint four times faster than steel. This makes it difficult to create the puddle when you start welding. When you are about to finish, the metal is so hot, it’s like you weld with higher amperage.
This is why you want to start with high amperage to melt the joint, but high travel speed to prevent overheating the base metal. Preheating also helps.
When aluminum contacts the air’s oxygen, a tough oxide layer forms on the surface. This layer protects the metal but makes welding much harder.
The aluminum oxide has a high melting point of 3,762 °F (2,072 °C) compared to aluminum’s 1220 °F (660 °C). The arc can melt the metal underneath, but the oxidized layer can hold it in place. When the layer finally breaks, the molten metal pours out creating a mess, especially in out-of-position welding.
The oxidized layer also acts as an electrical insulator, making striking the arc harder. As a result, you must remove this layer to make welding easier.
Aluminum also has high porosity problems. Hydrogen trapped in the molten metal tries to escape when the molten puddle solidifies, creating porosity. Porosity makes the joint weaker and quite ugly. The main sources are poor shielding gas protection and impurities on the base and filler metals.
Welding always makes the heat-affected zone (HAZ) weaker. The HAZ is the area next to the joint affected by heat. Because aluminum is soft, manufacturers apply various methods to make it stronger. Unfortunately, the arc’s heat can reduce this strength by 30-40%.
Aluminum doesn’t like to contact other elements when it’s molten. A low, even invisible, amount of impurities on the metal’s surface can make the final bread brittle and crack sensitive. The previously mentioned oxidation also acts as a pollutant.
Another difficulty is that molten aluminum doesn’t change color to red like steel. It’s harder to know when the puddle forms.
What is the easiest aluminum to weld?
Aluminum’s weldability varies between each type. Others are quite weldable, but others are not. To keep things simple, I’ll mention the most well-known alloys of each type.
The popular 5052, 1100, and 3003 aluminum alloys are the easiest to weld. The 6061 is quite popular, but it’s heat-treated, so it has a higher cracking risk. But with the proper filler metal, it’s considered easy to weld.
The 7075 and 2024 are not welded by the common arc processes because they are very tough and easy to crack.
The hard-to-weld alloys are used for demanding applications, for instance, aerospace. These industries use advanced welding processes and procedures for these alloys without lowering their strength or cracking them.
What is the easiest aluminum filler metal to use?
While you choose the filler metal considering the job at hand, for many projects you can pick from a few different types. This makes welding easier.
The easiest aluminum filler metal is the 4043 because it’s easy to melt and flow. It also has the lowest cracking risk.
The 4043 is mostly used as a filler metal. It has properties that greatly reduce the hot cracking risk. It’s excellent for 6061, but it cannot weld 5xxx alloys with high magnesium, for example, the 5083 or the 5086.
However, with a MIG welder, it’s easier to use the 5356 wire since it’s much stronger than the 4043. This will prevent entangled wire (birdnesting) and frustration. But it creates a dirtier weld and has a higher risk of cracking.
| Aluminum alloy | Filler metal |
|---|---|
| 1100 | 1100 |
| 3003 | 1100, 4043, 5356 |
| 5052 | 5356 |
| 6061 | 4043, 5356 |
Now let’s see how easy or hard each one of the common arc welding processes is for aluminum.
A spool gun is the easiest way to weld aluminum
A spool gun is a device you connect to a MIG welder. The spool gun takes power and shielding gas from the welder, but has its own wire-feeding device that accepts small 4″ (10 cm) spools.
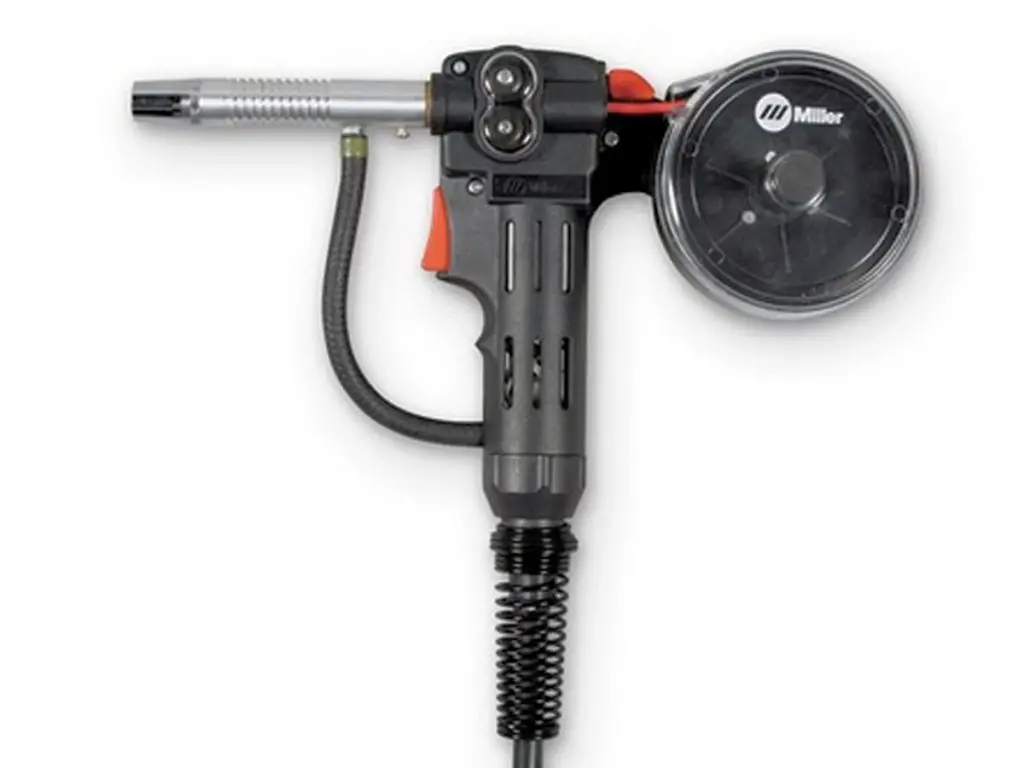
A spool gun solves the problematic wire-feeding nature of soft aluminum wires. These wires are easy to deform and stuck in the rollers and the long liner of a typical MIG torch. If that happens, the feeding mechanism will continue to feed wire, resulting in birdnesting.
The spool gun uses small rollers and the wire travels only a short distance. This eliminates the wire issues.
To use a spool gun, you must switch a button on the panel or inside the MIG machine. Or, if your machine has an LCD screen, select the proper option. This will stop the welder’s feeding mechanism.
When you use aluminum wire, you always use 100% argon shielding gas. You cannot use a blend even if it only has a 1% of oxygen or CO2. The oxygen will rapidly form the undesirable oxide, making welding not only hard but impossible.
Let’s see some tips if you use a spool gun:
- Cleaning the joint from grease, oil, and the oxidized layer is essential.
- Always push the gun for improved shielding gas coverage to prevent porosity.
- Pushing also removes the remaining oxide layer on the workpiece easier and leaves less black soot.
- Use a long 3/4″ (19 mm) stickout.
- As a beginner, it’s best not to weld aluminum thinner than 1/8″ (3.2 mm) to avoid burning through and warping.
Now let’s see the disadvantages of spool guns:
- The cost of a quality spool gun can be considerable.
- You must handle the spool gun with care and avoid dropping it because it’s easy to break.
- Not all MIG machines can connect with a spool gun.
- Furthermore, each manufacturer recommends specific spool guns for their machines for the best compatibility.
- They are bulky and may prevent access to tight areas.
- Their added weight can fatigue your hands.
- The spools are small and require frequent replacement if you have much work to do.
MIG is easy but has wire-feeding issues
MIG is the easiest welding process. The machine includes an automatic wire-feeding mechanism that simplifies the manual handling of the MIG torch. It’s much easier to weld aluminum than stick or TIG welding.
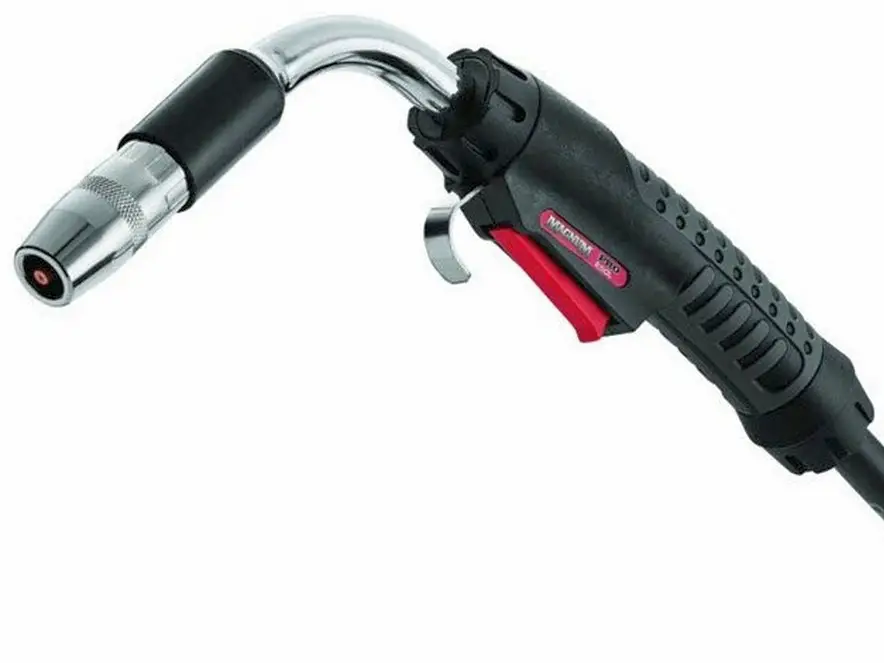
However, there are some issues with the soft aluminum wire that tends to create birdnesting inside the welder.
To avoid birdnesting, you must make some modifications to the feeding mechanism and the MIG torch:
- You must change the drive rollers inside the welder. The aluminum wire needs U-shaped rollers to maintain its shape. Typical V-shaped rollers for steel will deform the wire.
- You must also set the correct pressure on the drive rollers to avoid deforming the wire. The best way is to start low and apply pressure until the wire stops slipping. If you try to hold or block the wire, as you do with steel wire, it may stick in the liner.
- It’s also important to notice if sharp edges in the feeding mechanism scratch the wire. If there is a problem, replace the parts with higher quality ones made from softer materials, with rounded edges, etc.
- The MIG torch is long and the soft wire that passes through it can get scratched, creating shavings that will block it given enough time. To avoid this, you must change the steel liner with a teflon one that doesn’t scratch the wire.
- It’s also vital to keep the cable straight and avoid kinks, or the wire may twist and stop.
- There are also contact tips for aluminum. These have a 10% wider opening because aluminum expands more than steel. It’s also helpful to keep a few of them around for quick replacement.
- Another tip is to use the thickest wire possible for the metal thickness you weld.
As mentioned earlier, the oxide acts as an electrical insulator. This can cause trouble with the working (grounding) clamp connection.
A good connection is more important with MIG than stick or TIG welding. So ensure you connect the clamp to an oxide-free area close to the work.
TIG and stick welding aluminum is not an easy thing to do, but let’s see the general picture.
With TIG it’s hard to weld aluminum but gives the best results
TIG welding is the hardest process. You need to not only handle the torch with one hand and the filler metal with the other, but you often use a foot pedal for amperage control.
Aluminum makes it much harder because you must set many settings on the machine, such as AC balance, AC frequency, pulsing, pre- and post- gas flow, etc.
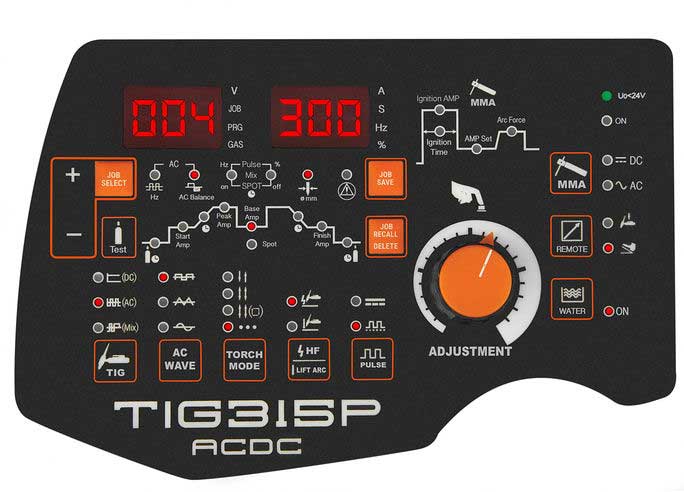
TIG is also famous for requiring clean metals. Even invisible dirt on aluminum or the filler rod can create problems such as porosity and tungsten contamination.
Another difficulty is that aluminum needs a fast traveling speed. You must be able to feed the wire pretty fast to keep up.
However, all those difficulties also are its strength. With TIG, you can get the best-looking and strongest beads and weld very thin workpieces.
Stick welding is hard and messy, but it’s suitable for repairs
Stick welding is a hard process to learn, but not as much as TIG. The issue here is the aluminum rods that make welding very hard. Even welders with decades of experience have trouble making good-looking beads with these rods.
But let’s see the reasons why these rods are hard to weld with:
- The rods tend to stick to the workpiece far easier than 7018 rods or even stainless steel rods. They are also hard to restart.
- You will get high porosity if you don’t hold a steady and tight arc.
- They cannot weld thin metals. It’s best not to try if the workpiece isn’t 1/4″ (6.4 mm) thick or more.
- The strong arc makes the joint weaker than the rest of the workpiece.
- Aluminum slag is corrosive, you should completely remove it from the joint.
- They are extremely sensitive to moisture. Even slight exposure will result in excessive porosity. If you forget them in a high moisture environment, their flux will deteriorate fast.
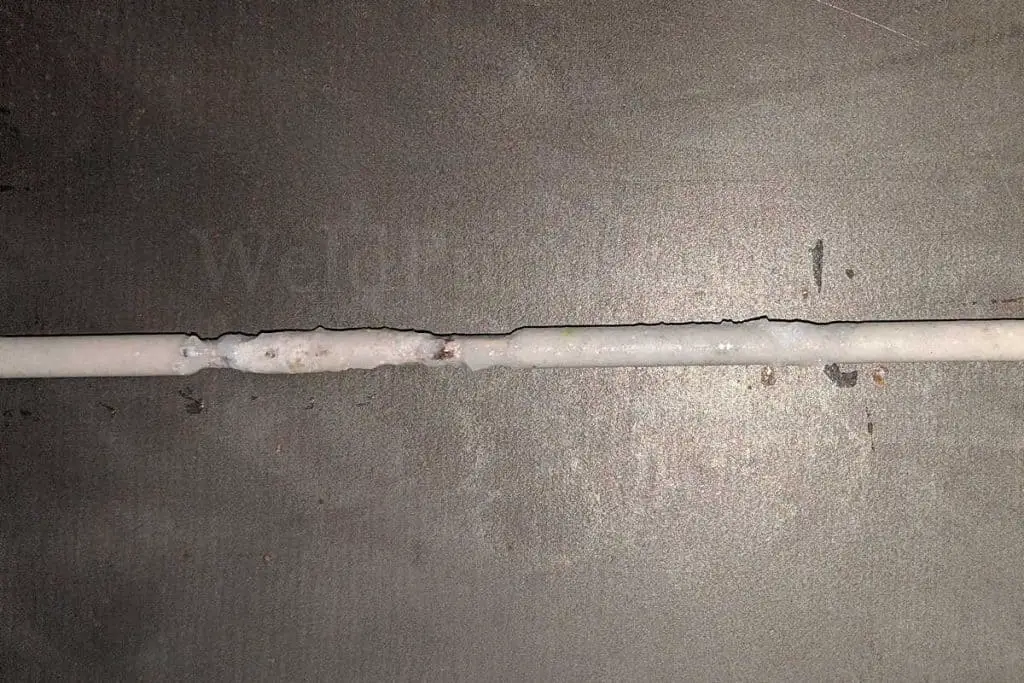
However, stick welding has its uses for repair work in the field. You only need the welding machine and the rods to quickly repair aluminum that’s not perfectly clean. You also don’t carry around gas tanks, windshields, etc.
Some tips to make stick welding easier are:
- The flux can remove impurities and the oxidized layer, but it’s best to clean the joint as well as possible.
- Always keep a short arc, no more than the rod’s wire diameter.
- Use the package’s amperage recommendations but use a fast-traveling steed.
- Always pull the rods to keep the slag back without forming slag inclusions.
- You must use these rods immediately when you open the box or keep them in rod ovens.
Gas welding aluminum with an oxyacetylene torch was widely used, but is losing ground to arc welding. With it, it’s very hard to weld aluminum and needs a lot of skill to get good results.
Tips for easier aluminum welding
- Clean the surface with acetone, alcohol, or mild alkaline product to remove grease and oils. With experience, you can weld brand-new aluminum without perfectly cleaning it. But as a beginner, clean it to remove even the lowest amount of dirt.
- Clean the oxidation by using a dedicated stainless steel wire brush. Always brush in one direction to avoid smearing the oxidation on the surface. After that, use the previously mentioned chemicals to remove oxide residues. There are also chemical products for removing oxidation. With chemicals, you avoid scratching the surface, and you save time. Follow each product’s instructions, and don’t forget to clean their residue. Residues may decompose to harmful gases when you weld over them.
- After preparing the joint, weld as soon as possible to avoid accidental dirt or moisture. Furthermore, the surface oxidation gets thicker the longer you leave it unwelded.
- Wear the proper PPE for the necessary protection, but at the same time ensure they let you work with comfort and dexterity.
- To avoid burning through or warping thin aluminum, place it on a thick aluminum or copper workpiece. The thick metal will act as a heat sink and pull excessive heat.
- If the base metal is thick, for example, 1/4″ use preheating up to 230 °F (110 °C).
- It’s best to pass a straight bead or use a slight whipping forth and back technique when welding aluminum. Wide weaving beads are not recommended for this metal.
While the article is about welding, meaning melting the workpieces to fuse them, let’s see another way to bond aluminum that is much easier.
An alternative easier way to bond aluminum
You can braze aluminum using a flame torch with propane or MAPP gas and a suitable aluminum rod. You can also use an oxyfuel torch if it’s available.
Brazing is a method that uses lower heat than welding, and you do not melt the workpieces. You only heat them high enough so that only the filler metal melts when you touch it on the hot joint.
The special aluminum rod has a lower melting point than all aluminum alloys. Most often, around 730 °F (390 °C). It’s also covered with flux material that cleans the oxidation and other surface impurities.
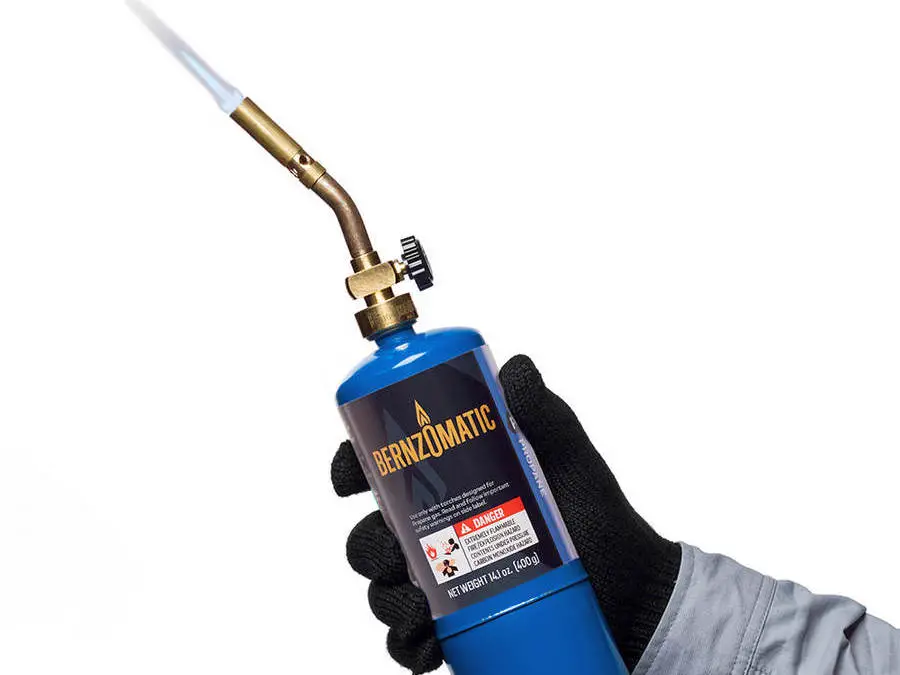
Brazing creates a joint that is weaker than welding, but strong enough for small projects that don’t take heavy stress.
Another benefit is that the aluminum parts keep their form and strength. The heat isn’t high enough to alter their metallurgical characteristics. Warping is not a problem, except if they are really thin. You also get a good-looking joint.
The procedure is simple:
- Brazing needs totally clean materials. Remove all dirt and the oxidized layer.
- After that, use the torch to preheat the joint. Always move the torch all over it. If you keep it steady, you will end up with a hole. To test for the right temperature, you can touch the rod to see if it melts.
- Then preheat for a few seconds more, remove the torch, and run the rod over the joint to fill it.
- Finally, leave the workpiece to slowly cool down.
Conclusion
The easiest start for aluminum welding is with a spool gun. It’s costly, but it will save you from lost time, consumables, and frustration. A typical MIG welder with the proper rollers, liner, consumables, and handling can also easily weld aluminum.
On the other hand, TIG welding is very hard but for the same reason can give you the best results. Last, stick welding uses rods that make things very hard to weld. It’s suitable for occasional repair work.
Other Weldpundit articles
